Watchtowers placement
Contents
Watchtowers placement#
In this section you will learn how to place and connect the Watchtowers in the city
This is a picture of the current Autolab in ETHZ. It will give you an approximate idea on how to place your watchtowers and how many you should use.
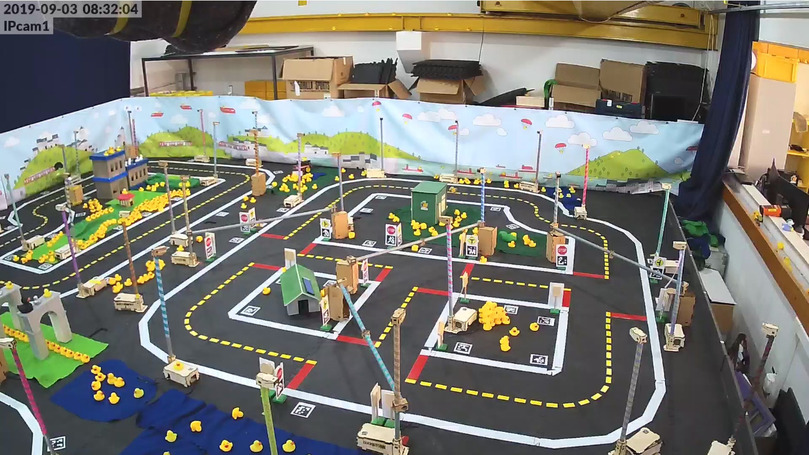
Fig. 53 Picture of the Zurich ETH Autolab.#
Rules to position the watchtowers#
There’s only two general rule of putting Watchtowers in a city:
Make sure that the field of views of Watchtowers do cover the whole city.
There should be enough overlapping between field of view between Watchtowers.
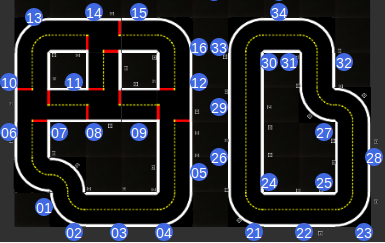
Below is a more synthetic view of the watchtower placement in ETHZ. The ratio of watchtower to road tiles is around 2:3.
Below is the field of view of watchtowers. Please keep in mind that they cover approximately 3 tiles each (even more in some cases), but that on the edge of the image, despite rectification, the image is distorted and thus the Apriltag detection might give inaccurate results. This is why overlapping field of view are important. The more, the better.
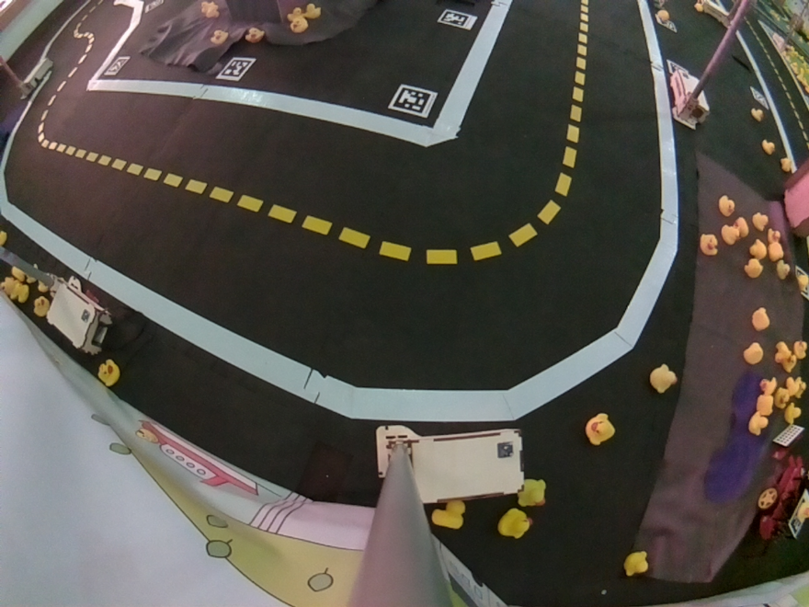

Fig. 54 Watchtower view straight line.#
Connection of the watchtowers#
Beside the placement of Watchtowers, they should be connected via Ethernet cables. At ETH, the Watchtowers are first connected to switches, that are connected to our router. At ETHZ, the whole Autolab is on a stage, and we route the cables directly beneath it, to keep the track clean from cables.
Then we have one PC connected via Ethernet to the router, for faster and more reliable communication with the watchtowers.
Recommended network setup#
Since all Watchtowers might send data at the same time, we recommend you have a strong network setup:
The best, and currently used in the ETHZ Autolab, is a switch with 1 Gb/s ports for each watchtower, with 2 ports at 10 Gb/s, that are connected to a central computer (which in turn needs a 10 Gb/s network card).
TODO
Motivate the router requirements.
Power management#
Last but not least, these Watchtowers need power. Remember to prepare your USB chargers and cables that support 2.4A output.
Note
EXPERIMENTAL: If you want to get fewer cables around, the possibility of using PoE (power over ethernet) exists. With an additional hat, you can power the Raspberry Pi directly through the ethernet jack (provided that your switch supports the feature).