Duckietown robot
Contents
Duckietown robot#
What you will need
An Raspberry Pi 4
What you will get
A Duckietown for the Duckietown in the Autolab
What is a Duckietown robot?#
Logically, a Duckietown robot oversees the communications in a Duckietown. So there is one Duckietown robot per Duckietown. Since the Duckietown robot only does computations and does not have actuators or sensors, it is simply a Raspberry Pi 4 connected to the same network as the other robots in the Duckietown.
Initialize#
Now you need to initialize the operating system of the Duckietown robot.
Flash the SD card#
The parameters:
concat_map_nameshould be the name of the map for this Duckietown merged in theduckietown/duckietown-worldGithub repository, but concatenated over the underscore(_)s. E.g. For map nameETH_large_loop, theconcat_map_nameisETHlargeloop.country_codeis the two-letter country code
Command to flash:
dts init_sd_card --hostname ![concat_map_name] --type duckietown --configuration DT21 --country ![country_code]
Connect to network and boot#
The network connection should be wired. Insert the SD card into the Raspberry Pi 4 and power it on. You can monitor when the boot process is complete by checking if the Duckietown shows up in:
dts fleet discover
Setup#
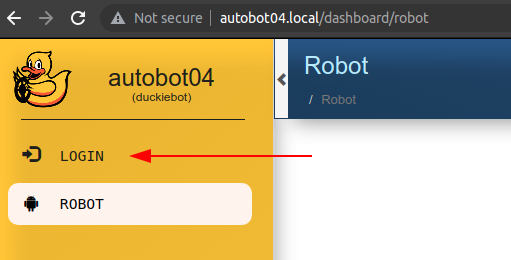
Navigate to the Duckietown dashboard and login#
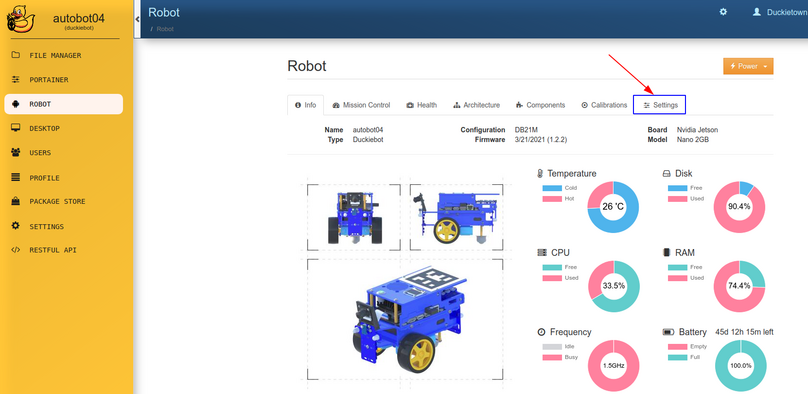
Select “Settings” pane#
Fill in the configs for “Autolab”#
The Map name field requires a string, e.g. ETH_large_loop. It’s the name of the map of the Duckietown created and merged to the duckietown/duckeitown-world GitHub repository.
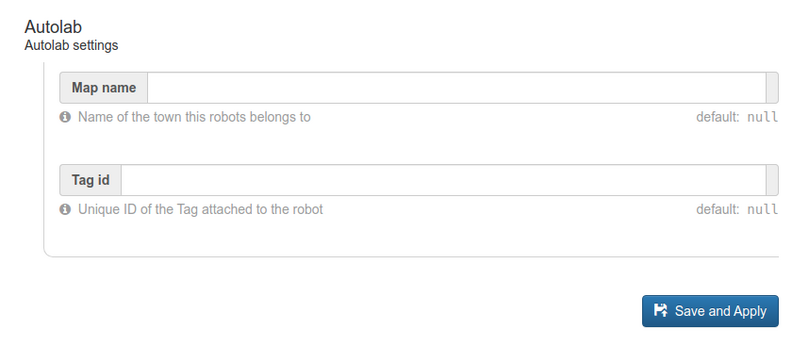
Attention
Be careful not to confuse between Map name and concat_map_name when initializing the SD card.
Note
The Tag id field should be omitted for a Duckietown robot. (It does not have an Apriltag)
Click Save and Apply and refresh the page. The user inputs should appear in the fields now.